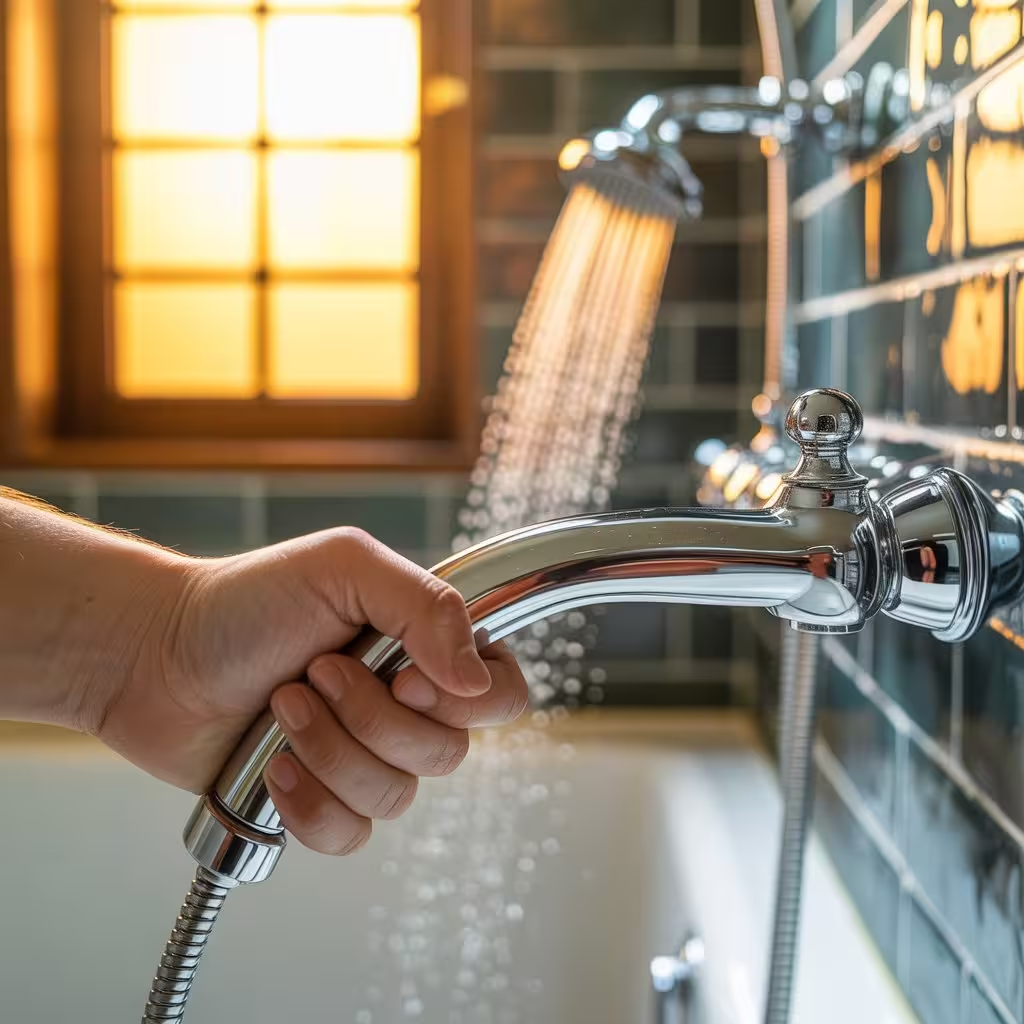
You turned the shower on. Waited. Still cold. Before you call a plumber, this guide walks you through the 10 most likely culprits — with step-by-step fixes you can actually try, realistic costs, and clear signals for when to call a professional.
Most no-hot-water problems have a clear cause and a practical fix. Many you can tackle yourself in under 30 minutes. This guide covers all 10 causes — for both gas and electric water heaters — with honest assessments of what is DIY-safe and what genuinely requires a licensed plumber.
QUICK SELF-DIAGNOSIS: WHICH HEATER DO YOU HAVE?
| GAS HEATER: Look for a flue pipe (metal exhaust vent) on top and a burner assembly at the bottom | ELECTRIC HEATER: Look for two electrical conduit wires entering the unit and access panels on the side |
| TANKLESS: No storage tank. Compact wall-mounted unit, heats water on demand | CHECK THE AGE: Look at the serial number label — first 4 digits usually indicate the manufacture year and month |
01
Pilot Light Is Out [GAS ONLY]
| SYMPTOMS: No hot water at all · Gas heater shows no flame · Pilot light window is dark |
The pilot light is a small, continuously burning flame inside your gas water heater. It is what ignites the main burner when your thermostat calls for heat. If it goes out — and it does, more often than you might expect — your burner never fires and you get no hot water at all.
Pilot lights get extinguished by a draft blowing through the utility room, a brief gas supply interruption, or age-related wear on the thermocouple. Newer gas heaters use electronic ignition, so this issue primarily applies to heaters more than 10-12 years old.
HOW TO FIX IT — RELIGHTING THE PILOT
| 1 | Turn the gas valve knob to OFF and wait 5 full minutes for any residual gas to dissipate. |
| 2 | Set the temperature knob to its lowest setting (or PILOT if that option exists). |
| 3 | Turn the gas knob to PILOT. Hold it in as you press the igniter button repeatedly — or use a long lighter at the pilot opening. |
| 4 | While still holding the knob down, watch for the small pilot flame to appear. Keep holding for 30-60 seconds to heat the thermocouple. |
| 5 | Slowly release the knob. If the pilot stays lit, return the knob to your desired temperature setting. |
| 6 | If the pilot will not stay lit after 2-3 attempts, the thermocouple likely needs replacing — see Cause #6. |
| REAL SCENARIO
A homeowner woke up to no hot water after a stormy night with the basement window left slightly open — the pilot had been blown out by a draft. Relighting it per the label instructions (all modern water heaters have a relight diagram on the unit) restored hot water within 45 minutes — the time it took the 40-gallon tank to reheat. |
| SAFETY — EMERGENCY
If you smell gas (rotten egg odor) at any point, do NOT attempt to relight. Evacuate immediately and call your gas utility from outside. |
ESTIMATED COST: DIY Cost: $0 | Plumber if thermocouple needed: $75-$150
02
Tripped Circuit Breaker or Blown Fuse [ELECTRIC ONLY]
| SYMPTOMS: Completely no hot water · Electric heater unresponsive · Recent electrical event or power surge |
Electric water heaters typically draw 4,500 watts or more and are wired to a dedicated double-pole 30-amp circuit breaker. When the circuit trips — usually from a power surge, voltage fluctuation, or an internal fault — the heater loses all power and stops heating entirely.
This is the first thing to check on any electric heater. It takes under two minutes and costs nothing.
HOW TO FIX IT — RESETTING THE BREAKER
| 1 | Go to your main electrical panel (usually in the garage, basement, or utility room). |
| 2 | Locate the breaker labeled ‘Water Heater.’ It will be a double-pole breaker taking up two slots. |
| 3 | If tripped, the switch will be in the middle position (between ON and OFF) or fully flipped to OFF. |
| 4 | Push it firmly all the way to OFF first, then flip it back to ON. |
| 5 | Wait 30-90 minutes for the tank to reheat before testing hot water again. |
| REAL SCENARIO
After a neighborhood lightning storm and brief power outage, a family’s hot water went out. The water heater breaker had tripped during the surge. A single breaker reset — no tools, no cost — resolved the issue in under 2 minutes. Hot water returned after a 40-minute reheat cycle. |
| WARNING
If the breaker trips again immediately or repeatedly, stop. A breaker that keeps tripping is protecting you from a wiring fault, a failing heating element, or a short circuit. Continued resets without diagnosis can cause a fire. Call an electrician or plumber. |
ESTIMATED COST: DIY Cost: $0 | Electrician if wiring fault found: $150-$350
03
Thermostat Set Too Low or Tripped High-Temp Cutoff [GAS & ELECTRIC]
| SYMPTOMS: Lukewarm water instead of hot · Hot water runs out unusually fast · Water barely warm |
Your water heater’s thermostat controls the target water temperature. The EPA and most plumbers recommend setting it between 120°F and 140°F. Below 120°F, you will notice lukewarm rather than hot water, and there is a health concern — Legionella bacteria can grow in tanks sitting below 120°F.
On electric heaters, there is also a high-temperature cutoff (ECO switch) — a safety device that trips if the water overheats. A tripped ECO is one of the most common causes of no hot water that homeowners miss.
HOW TO FIX IT — CHECK AND ADJUST THE THERMOSTAT
| 1 | GAS HEATER: Find the dial on the gas valve assembly near the bottom. Turn it clockwise toward a higher setting (120-140°F range). Wait 30 minutes. |
| 2 | ELECTRIC HEATER: Turn off the breaker first. Remove the upper access panel on the side of the heater. |
| 3 | Pull back the insulation. You will see the thermostat and a red button above it — that is the ECO (emergency cutoff) reset button. |
| 4 | Press the red button firmly until you feel or hear a click. Replace insulation and panel, restore power, wait 1 hour. |
| 5 | If there is also a lower thermostat (most electric heaters have two), remove that panel and check/reset it too. |
| REAL SCENARIO
A homeowner lowered their water heater thermostat to 100°F before a 2-week vacation to save energy. Upon returning, they had water that was barely warm. Adjusting the dial to 125°F and waiting 45 minutes solved the problem entirely. |
| WARNING
If the ECO trips repeatedly, the thermostat itself is likely faulty and causing the water to overheat — a replacement thermostat is needed rather than continued resets. |
ESTIMATED COST: DIY Cost: $0 | Replacement thermostat: $15-$40 part + $100-$150 labor
04
Failed Heating Element [ELECTRIC ONLY]
| SYMPTOMS: No hot water at all (upper element) · Some hot water but runs out fast (lower element) |
Electric tank water heaters use two immersion heating elements — one near the top, one near the bottom. The upper element heats first and is responsible for keeping the upper portion of the tank hot for immediate use. The lower element does the sustained heating for refilling.
When the upper element fails: you get no hot water at all. When the lower element fails: you get a small amount of hot water that runs out very quickly. Elements fail from mineral scale buildup, running dry during installation, or simply from age.
HOW TO FIX IT — TESTING AND REPLACING A HEATING ELEMENT
| 1 | Turn OFF the breaker. Attach a multimeter probe to each terminal of the element — a reading of 10-16 ohms means it’s good; infinite or 0 means it’s failed. |
| 2 | If failed: Turn off the cold water inlet valve. Open a hot water faucet in the house to relieve pressure, then partially drain the tank. |
| 3 | Use an element wrench (specific socket wrench, about $10 at hardware stores) to unscrew the old element counterclockwise. |
| 4 | Install the new element with a fresh gasket. Match wattage exactly (e.g., 4500W, 240V — shown on old element’s label). |
| 5 | Refill tank (run a hot faucet until water flows steadily), then restore power. |
| REAL SCENARIO
A household of four noticed hot water running out after just one shower. The upper element tested fine, but the lower element read open (failed). A $14 replacement element and 90 minutes of DIY work restored full hot water capacity. |
| WHEN TO CALL A PRO
If you are not comfortable working with 240V wiring, or if both elements fail simultaneously — which points to a deeper electrical fault — have a licensed heating and cooling repair technician handle the replacement safely. |
ESTIMATED COST: Replacement element: $10-$30 | Professional replacement: $150-$300
05
Sediment Buildup in the Tank [GAS & ELECTRIC]
| SYMPTOMS: Popping or rumbling sounds · Slower heating · Less hot water than before · Gritty water |
Over time, dissolved minerals in your water supply — primarily calcium and magnesium — precipitate out and settle at the bottom of your water heater tank. This layer of sediment acts as an insulating barrier between the burner (or heating element) and the water, making the heater work significantly harder and reducing effective hot water capacity.
In areas with hard water (above 7 grains per gallon), significant sediment can accumulate in as little as 2-3 years without maintenance. The popping or rumbling sound you might hear is steam bubbling through the sediment layer — a sign the buildup is serious.
HOW TO FIX IT — FLUSHING THE TANK
| 1 | Turn off the cold water supply valve and set the heater to its lowest setting (or vacation mode). |
| 2 | Connect a garden hose to the drain valve at the bottom of the tank. Run the other end to a floor drain or outside. |
| 3 | Open a hot water faucet inside the house (prevents vacuum lock) then open the drain valve. |
| 4 | Let the tank drain completely — this can take 20-60 minutes depending on tank size and sediment volume. |
| 5 | Briefly open the cold water supply to flush remaining sediment through the drain hose. Repeat until water runs clear. |
| 6 | Close drain valve, disconnect hose, refill tank fully before restoring power or relighting pilot. |
| REAL SCENARIO
A couple in a hard-water region noticed their 6-year-old water heater making loud rumbling noises and running out of hot water 30% faster than before. Flushing the tank yielded nearly 2 gallons of sandy sediment. After the flush, heating improved noticeably and the noises stopped. They now flush annually as routine maintenance. |
How Often Should You Flush?
| WATER TYPE | HARDNESS | FLUSH FREQUENCY |
| Soft water | Under 3 GPG | Every 2 years |
| Moderate hard water | 3-7 GPG | Annually |
| Hard water | 7-10 GPG | Every 6 months |
| Very hard water | Over 10 GPG | Quarterly or install water softener |
ESTIMATED COST: DIY Cost: $0 (garden hose required) | Professional flush: $80-$200
06
Faulty Thermocouple or Thermopile [GAS ONLY]
| SYMPTOMS: Pilot light will not stay lit · Pilot goes out when you release the button · Gas heater, older model |
The thermocouple is a safety device that sits in the pilot flame. It generates a small electrical voltage from heat — just enough to hold the gas valve open and keep the pilot burning. When the thermocouple wears out or becomes coated in soot, it stops generating sufficient voltage. The gas valve then closes as a safety precaution, extinguishing the pilot.
This is one of the most common gas water heater repairs. The thermocouple is an inexpensive part ($10-$25) and is straightforward enough that confident DIYers tackle it regularly — though a plumber can do it in under an hour.
HOW TO FIX IT — REPLACING THE THERMOCOUPLE
| 1 | Turn off gas supply and let the unit cool for 30 minutes before working. |
| 2 | Locate the thermocouple — it is the thin copper tube with its tip sitting in the pilot flame. Trace it to where it connects to the gas valve (a threaded fitting). |
| 3 | Unscrew the thermocouple from the gas valve (usually hand-tight or one wrench turn). Slide the tip out of the pilot bracket. |
| 4 | Take the old thermocouple to a hardware store to match the length and fitting type. Universal thermocouples (~$10) fit most models. |
| 5 | Install the new thermocouple in reverse order. Thread the nut by hand, then snug with a wrench — do not overtighten. |
| 6 | Restore gas and relight the pilot per the steps in Cause #1. It should now stay lit. |
| REAL SCENARIO
A homeowner spent 20 minutes repeatedly relighting a pilot that would not stay on — classic thermocouple failure. A $12 universal thermocouple from the hardware store and a 45-minute replacement solved the problem. The old thermocouple showed clear discoloration from overheating at the tip. |
ESTIMATED COST: Thermocouple part: $10-$25 | Plumber to replace: $75-$150
07
Gas Supply Problem or Valve Failure [GAS ONLY]
| SYMPTOMS: No pilot, no ignition · Gas appliances also not working · Smell of rotten eggs |
If your gas supply is interrupted — whether from a closed shutoff valve, a utility outage, or a line issue — your water heater gets no fuel and produces no heat. A faulty gas control valve on the heater itself can also cause this: a failed gas valve typically requires professional replacement.
| SAFETY — EMERGENCY
GAS LEAK EMERGENCY: If you smell rotten eggs or sulfur near your water heater, do NOT flip any electrical switches. Open windows and doors, leave the building immediately, and call your gas utility and fire department from outside. Do not re-enter until cleared by emergency services. Never attempt to locate or repair a gas leak yourself. |
HOW TO FIX IT — DIAGNOSING A GAS SUPPLY ISSUE
| 1 | Check other gas appliances (stove, furnace). If none work, contact your gas utility — there may be a service outage in your area. |
| 2 | Trace the gas line to your water heater and locate the inline shutoff valve (a lever or ball valve on the supply pipe). Confirm it is open (lever parallel to pipe = open). |
| 3 | Check the gas control valve on the heater itself — look for error codes on modern units with LED indicators. |
| 4 | If the pilot lights fine but the main burner never ignites, the gas valve itself may have failed and requires professional replacement. |
| REAL SCENARIO
A homeowner had plumbing work done and the plumber accidentally partially closed the water heater gas shutoff valve while working nearby. The pilot could barely hold and the main burner would not fire. Opening the valve fully — a 10-second fix — resolved the issue completely. |
| WHEN TO CALL A PRO
Gas valve replacement is not a DIY task. A faulty gas control valve costs $100-$300 in parts and requires a licensed plumber or gas technician to install safely. |
ESTIMATED COST: Valve inspection: Free (DIY check) | Gas valve replacement: $200-$500 installed
08
Water Heater Is Too Small for Your Household [GAS & ELECTRIC]
| SYMPTOMS: Hot water runs out after 1-2 showers · Always cold if you shower last · Problem existed since moving in |
This is not a malfunction — it is a capacity mismatch. If your household’s hot water demand consistently exceeds what your tank can supply and recover in time, you will always be running out. Tank sizing is based on the number of people in the home and peak usage patterns.
General sizing guide: 30 gallons suits 1-2 people; 40 gallons for 2-3 people; 50 gallons for 3-4 people; 80+ gallons for 5 or more. First-hour rating (FHR) — not just tank size — is the better metric when comparing units.
HOW TO FIX IT — GETTING MORE HOT WATER
| 1 | Short term — stagger showers: Allow 30-45 minutes between showers for a gas heater or 60-90 min for electric to partially refill and reheat. |
| 2 | Raise the thermostat slightly: Increasing from 120°F to 130-135°F effectively increases usable hot water volume. Be mindful of scald risk for young children. |
| 3 | Upgrade to a larger tank: Get a unit sized for 1-2 people beyond your current household count. |
| 4 | Consider a tankless (on-demand) heater: Unlimited hot water since it heats in real time — ideal for large families or homes with heavy simultaneous demand. |
| REAL SCENARIO
A family of five had a 40-gallon electric heater — fine when first installed with three family members, but chronically inadequate after two more joined. Rather than upgrading to a 75-gallon tank, they installed a tankless gas heater. Morning rush with 3 simultaneous showers went from a daily conflict to a non-issue. |
ESTIMATED COST: Larger tank installed: $600-$1,400 | Tankless heater installed: $800-$2,500
09
Broken Dip Tube [GAS & ELECTRIC]
| SYMPTOMS: Hot water that gets cold very fast · Small white or gray plastic flakes in water · Never fully hot |
The dip tube is a long plastic pipe that runs from the cold water inlet down to the bottom of the tank. Its job is to deliver incoming cold water to the bottom, away from the hot water outlet at the top. When it breaks, cold water enters at the top and mixes directly with your hot water supply before it ever leaves the tank.
Broken dip tubes are frequently misdiagnosed as a thermostat problem or a failing heater. The plastic flake clue is a distinctive tell. Heaters manufactured between 1993-1997 had a particularly defective plastic type that is prone to failure.
HOW TO FIX IT — REPLACING THE DIP TUBE
| 1 | Turn off the water heater and cold water supply. Open a hot faucet inside to relieve pressure. |
| 2 | Disconnect the cold water inlet pipe from the top of the heater (usually a push-fit or threaded connector). |
| 3 | Pull out the old dip tube — it may come out in pieces if broken. Remove all fragments. |
| 4 | Insert a new dip tube (available at plumbing supply stores for $10-$20, match your inlet fitting size). Modern replacements are cross-linked polyethylene. |
| 5 | Reconnect the cold water inlet and restore service. Also clean out plastic flakes from your faucet aerators and shower heads, as they may be clogged. |
| REAL SCENARIO
A homeowner noticed small white plastic specks clogging her kitchen faucet aerator and shower head, combined with hot water that turned tepid almost immediately. A plumber confirmed a shattered dip tube in a 1995-model heater. Replacing the tube — a $12 part and 30 minutes of labor — restored full hot water. |
ESTIMATED COST: Dip tube part: $10-$20 | Professional repair: $100-$200 total
010
Aging or Failed Water Heater [GAS & ELECTRIC]
| SYMPTOMS: Heater is 10+ years old · Recurring problems · Rusty water · Visible corrosion or leak |
The average lifespan of a tank water heater is 8-12 years for electric and 8-10 years for gas. Beyond this range, internal components degrade significantly. The anode rod — a sacrificial metal rod that prevents the steel tank from rusting — depletes completely, leading to internal corrosion. Once the tank itself begins to fail, no amount of component repairs will keep it reliable.
Signs the heater is at end of life include: water with a metallic or rusty color (especially from hot side only), visible rust on the unit’s exterior, water pooling beneath the tank, and chronic failures requiring repeated repairs within a short period.
HOW TO FIX IT — EVALUATING REPLACEMENT VS. REPAIR
| 1 | Find the age: Look at the serial number on the unit’s label. Most manufacturers encode the manufacture date in the first characters. For Bradford White, a letter indicates the year (A=2001, B=2002, etc.) followed by the month number. |
| 2 | Apply the repair-vs-replace rule: If the repair cost exceeds 50% of the replacement cost AND the unit is more than 7 years old, replace it. |
| 3 | Consider upgrading: Heat pump water heaters use 2-3x less electricity than standard electric heaters. Tankless gas heaters offer unlimited hot water. Federal tax credits may be available for high-efficiency upgrades. |
| 4 | Get 2-3 quotes from licensed plumbers before committing. Installation quality matters for long-term performance. |
| REAL SCENARIO
A homeowner had their 13-year-old gas heater repaired twice in one year — a thermocouple at $120, then a gas valve at $380. When it failed a third time with rusty water, the serial number revealed a 2010 manufacture date. The cost of another repair ($250) versus a new 50-gallon unit ($950 installed) made replacement the clear choice. The new unit came with a 12-year warranty. |
SAFETY — EMERGENCY
|
ESTIMATED COST: Standard tank replacement: $700-$1,500 installed | Heat pump upgrade: $1,000-$2,500 installed
When Should You Just Replace It?
Repairs make sense for younger heaters with isolated problems. But at a certain point, throwing money at an old water heater is like patching a sinking boat. Use this framework:
| REPLACE IF
Unit is 10+ years old AND experiencing any failure |
REPLACE IF
Repair cost exceeds 50% of new unit installed cost |
| REPLACE IF
Tank is visibly rusting, corroding, or leaking |
REPLACE IF
You have had 2+ repairs in the past 2 years |
| REPAIR IF
Unit is under 7 years old with a single, clear issue |
REPAIR IF
It is a simple part: thermocouple, element, dip tube |
Preventive Maintenance Checklist
Most no-hot-water emergencies are preventable. A simple annual maintenance routine keeps your heater running at peak performance and extends its lifespan significantly.
| TASK | FREQUENCY | DIFFICULTY | WHY IT MATTERS |
| Flush the tank (drain sediment) | Annually / 6-month in hard water | Easy DIY | Prevents efficiency loss & element damage |
| Test the T&P relief valve | Annually | Easy DIY | Safety — confirms it opens properly |
| Inspect the anode rod | Every 3 years | Moderate DIY | Prevents internal tank corrosion |
| Check for leaks around fittings | Every 6 months | Easy visual check | Catch issues before water damage occurs |
| Verify thermostat setting | Annually | Easy DIY | Legionella prevention + efficiency |
| Inspect pilot light / igniter (gas) | Annually | Easy visual check | Early warning of thermocouple wear |
| Professional inspection | Every 2-3 years | Professional | Full system check, spots issues early |
